Thursday, December 20, 2007

Got The Bug!


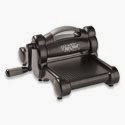
...the Cuttlebug that is!

I actually bought one quite a while back, but I haven't used it much because of my limited collection of embossing folders and dies.
Well, Tuesday night I decided I just HAD to bust out with my new Christmas stamps from the Holiday mini...it would be a total shame to put them away until next year! So I knew I wanted to use the tree stamp, and I liked the word block, but hmmm colors, and maybe use up some of this mega HUGE mat stack of Christmas paper I bought on sale in 2005! Well, let me tell you after I chose Stampin' Up!'s Gable Green as my card base, and picked the pretty striped paper I knew embossing it with the Cuttlebug was MANDATORY! I used my latest JoAnn coupon and ran out to get the D-Vine Swirls embossing folder everyone but me has been using for ages, and these cute little cards practically created themselves!


Friday, December 14, 2007

Friday's Sketch


I have a new DPS up for this week on SplitCoast!!! I'm posting them here too, simply because I want to share. I sincerely hope you like them and will put them to good use. I haven't scrapped them yet myself, and have big plans for last weeks sketch. I'm just waiting for the pictures to come in. I really need to finish up my Christmas cards though, so depending on how this weekend goes, there's a small chance I'll get a little scrapping in! TTFN!!!

Thursday, December 13, 2007

Where Has This Month Gone???

You might remember I'm having an open house this weekend. I have been like a crazy woman with my head cut off!!! Holiday decorations...shopping...housework...kiddos -- CALGON TAKE ME AWAY! hahaha J/K
This little 6x6 is one of the make and take options this week end. It uses a mix of old and new. The background was stamped with a hostess set that will be featured in the new catalog, and the patterned paper is currently available. It's called Designer Prints and comes in several pretty patterns and colors. Other projects we'll be doing include a fun holiday card that features a retiring set, and a little candle!
I made several paper ornaments and decorated this "Charlie Brown" tree, these are my giveaways for attendees!

I didn't get a chance to snap a pic of the doorprises...I'm headless, remember? Anyway, it's going to be fun!!!

Friday, December 7, 2007

Friendly Friday!!!


Happy, happy Friday everyone!


I posted a new sketch challenge today, and here it is for your delight and amazement! *tee hee* But seriously, I'm pretty excited about it. I also posted a little twist this week....I would like you to scrap about friendship and use a quote or a poem on your page!


I found a couple of websites to assist with quotes about friendship. You can use one of them, or feel free to use one of your own!!! Scrap pictures of someone truly dear to you, and either upload on SCS, or post a link to your page in my comments. I love to see the variety of creations that result from one idea! I'll be scrapping my own version this weekend, so watch for it!


Monday, December 3, 2007

December News

I decided not to create an "actual" newsletter this month. But, there are always things to share!

The retired list is available!
There are items in the Holiday mini still available until 12/15/2007! Read about this promotion. - See the Tags for All Stamp set!
~AND~ If you are a local stamper/crafter, don't miss my OPEN HOUSE!!!

Friday December 14th 6:00 - 9:00 PM
or
Saturday December 15th 2:00 - 5:00 PM

Door prizes - Bring a friend/get a gift - make and take activities - RSVP and receive a gift!


Use this link to email me and let me know which day you'd like to come!

Wednesday, November 28, 2007

Wednesday Wonders

If only I could quit my day job! It is a goal of mine, but I need to be patient and wait for the right time...
I was trying to work on some projects during lunch today, and my craft table is so buried it is pathetic!!! I have Almond Joys from Halloween stashed in my top drawer with the double stick tape, but I've been strong and I haven't touched them since Sunday! Maybe I should send them to Jan Tink!? She is such an awesome scrapper/crafter and she was my inspiration for a "new" technique I tried last night. She calls it Joseph's Coat Inside-Out. If you've heard of Emerging Color, it's basically the same, she just uses a background stamp.
Her tutorial is MORE than informative...it's entertaining, and you should give it a try! I can't share what I made because it is a top secret crafty thing I'm sending to a friend today, but let me tell ya, it's GORGEOUS!!!

Monday, November 19, 2007

Gobble Gobble

Turkey day is a commin' and I know you'll be taking pictures of your bloated loved ones during the holiday! ;) Well whenever you get around to scrapping them here is a compiled list of page title ideas I found on various websites, including The Perfect Title. Also, I found this page with links to several sites where you can create interesting ways to print off titles for your pages: CLICK ME!

  • A Bountiful Harvest
  • A Bunch of Turkeys
  • A Day Of Thanks
  • A Happy Heart Is A Thankful Heart
  • A Harvest Of Memories
  • A Hunting We Will Go
  • A Time For Giving Thanks
  • A Time To Give Thanks
  • American Pie
  • Be Thankful Always
  • Be Thankful For What You’ve Got
  • Be Ye Thankful Bountiful Blessings
  • Bless This Food
  • Bunch Of Turkey
  • Bushel Of Blessings
  • Canning Our Bounty
  • Carving Memories
  • Come, Ye Thankful People, Come
  • Cornucopia Of Blessings
  • Cornucopia Of Bounty
  • Count Each Day As A Blessing
  • Count Your Blessings
  • Dinner Time
  • Don't Call Me Late For Dinner
  • Don't Worry, Be Thankful
  • Eat Drink And Be Merry For Tomorrow We Will Diet
  • Family & Turkey & Football...Oh My!
  • Family And Food
  • Family Traditions
  • Feast With The Pilgrims
  • Feast Your Eyes On This
  • Friends, Family, Food And FOOTBALL!
  • Gather Together With Thankful Hearts
  • Give Thanks
  • Give Thanks With A Grateful Heart
  • Give Us This Day Our Daily Bread
  • Giving Thanks
  • Giving Thanks For The Simple Things In Life
  • Gobble, Gobble
  • Gobble ‘Till You Wobble!
  • God Is Good, God Is Great
  • Happy Harvest
  • Happy Turkey Day
  • Harvest Delight
  • Have a good fall, y'all
  • Horn of Plenty
  • I Am Thankful
  • I LOVE a Parade!
  • I Can't Believe I Ate The Whole Thing
  • I'm Thankful For...
  • In Everything Give Thanks
  • It's Turkey Time!
  • Let Us Give Thanks
  • Let's Get Stuffed
  • Let's Give Thanks
  • Let's Talk Turkey
  • Little Turkeys
  • Live Thankfully
  • Look At This Feast, Now Let's Eat This Beast
  • Lovin' in the Oven
  • May The Bounty Of The Season Fill Your Heart And Your Home
  • My Little Turkey
  • Nap Time
  • O, The Lord's Been Good To Me
  • Our Table Runneth Over!
  • Over The River And Through The Woods
  • Parade Paradise
  • Pilgrims And Indians Remembered
  • Pilgrim's Pride
  • Pilgrim's Progress
  • Pumpkin Pie
  • Save A Turkey, Send Out For Pizza
  • Sharing The Food
  • Sharing The Harvest
  • Share Your Blessings
  • Share Your Bountiful Harvest
  • So Much To Be Thankful For
  • Stuffed!
  • Stuffed With Stuffing!
  • Strutting Her Stuff-ing
  • Take Time To Be Thankful
  • Thankful For Elastic Waistbands!
  • Thankful Hearts
  • Thankful Hearts, Helpful Hands
  • Thanks for the Giving
  • Thanksgiving
  • Thanksgiving Bounty
  • Thanksgiving Day
  • Thanksgiving Is For All Creatures Great And Small
  • Thanksgiving Is Not A Time Of The Year, But An Attitude Of The Heart
  • Thanksgiving, Send Out For Pizza
  • Thanksgiving Time
  • Thanksgiving Traditions
  • The Dressing Of A Turkey
  • The Feast
  • The Turkeys Play On Thanksgiving Day
  • There Shall Be Showers Of Blessings
  • Tons Of Turkey
  • True Family Gathering
  • Turkey And Dressing
  • Turkey And Family Trimmings
  • Turkey Day
  • Turkey, Dressing And Pumpkin Pie
  • Turkey In The Straw
  • Turkey Talk
  • Turkey Time!
  • Turkey Tribute
  • Turkey Tunes And Holiday Wishes
  • We Are Gathered Here...
  • We Are Thankful
  • We Are Thankful For...
  • We Gather Together
  • We Gather Together To Ask The Lord's Blessing
  • We Give Thanks
  • What A Bunch Of Turkeys!
  • What A Feast!
  • What A Little Turkey
  • What We Are Thankful For:

Wednesday, November 14, 2007

Things Are Getting a Bit Sketchy

I want to announce my continued involvement with the weekly SplitCoastStampers scrapbooking challenges!!!

Last Friday was my debut as the lead sketch challenge hostess, I'm super excited to have been asked, and I plan to provide mostly original sketches of my own design, and on occasion a sketch from a guest hostess - it's going to be SUPER!

I kicked off with this DPS and hadn't had time to use it myself until Wednesday.


You are the first to see what I did with it...


I had a disagreement with the scanner today, so I had to use my camera to get these pages uploaded. I wish I'd had better photos for the layout, but these are all I have from my sweet girls birthday at school. Notice the hair in her face? Yeah, that's what remains from when she practically scalped herself with the scissors. That's my Sydney!

Tomorrow is FRIDAY, and lots of GREAT things are coming our way! Are you excited? I am!!!

Tuesday, November 6, 2007

Ask Sally

I recently discovered I actually have readers! So I guess I'm not always talking to myself!!! tee hee Well I decided to share some email correspondence I received (hope that's OK Alison) and feel free to put in your two cents if you have additional advice to share, just post in my comments. Also, if you have a question of your own, email me!

Dear Sally,

I really enjoy your blog and scrapbook layouts. I would really like to start scrapbooking, but feel a little overwhelmed. I never have enough pictures to make an entire book. Sometimes I don't even have enough to make a 2 page by page layout.
I have a friend who just bought a 3 ring binder and when she would ever have one page done she would add it. When you would open the book, the 2 pages had nothing to do with each other. Even if I did start a small book, what is your first page normally about? Does it
have a picture or just something about the theme? I would love it if you had any ideas or suggestions for me.
Thanks,
Alison

Alison,

Wow, thanks for the compliment! I guess one thing you should do is start taking more pictures! *wink*
Well if you know my style, you know I like to use a TON of pictures, but every once in a while, I do a layout with just one. It's a nice change with the right photo. You can even get larger prints and mix it up!
When I have too many pictures for one page and not enough for 2 (or I'm trying to avoid a 3rd page) I sometimes hide some in a little flip out or pull out element. I just did that yesterday with a page as a matter of fact. I folded a strip of patterned paper in thirds and attached it to the page with one picture on top. I put a little folded piece of ribbon at the bottom so you can tell it opens and when you lift the top piece there are two more photos...then you can fold down the inside and you see the journaling. Super easy!

If you do this just cut a slit in the page protector to provide access to the hidden elements! Another thought is to alter the size of your album, you could do a 6x6 or 8x8 instead of 8 1/2 x 11 or 12x12. As far as having pages that compliment each other inside your book, a sure way to accomplish that is to do themed albums. Some people do an album for vacations, one for birthdays, a Christmas album...etc. This is perfect for someone who doesn't want to scrap EVERYTHING. I personally prefer to just scrap chronologically....but I'm on a mission to scrap EVERYTHING! hee hee I was actually in a rut for a long time because I was stuck in the late 90's, but one day I decided to do some current events and I was liberated. I got on a roll that hasn't stopped yet! I have about 5 albums going at the same time, but it helps me stay interested and continue to scrap. Do whatever makes you happy! If I didn't answer this right or I missed something, let me know! You are welcome to call me too. I never get bored of talking about scrapping!

Sally Saenz

Something that I realize now that I did not address is an intro page when you first open the album. I have one book with a page in the cover that conveys what you'll find inside, but I don't usually do a page in the front just to "announce" the rest of the book. It can be frustrating if you find that you want to begin with a DPS, so in that instance an intro page would be appropriate...it could be something as simple as "Saenz Family 2006 - 2007" or if you are doing a themed album, "Christmas with the Saenz' 1995 - 2000" you get the idea!

Here's a few examples of hidden elements:


These were just done Saturday during VSBN, and this is the page I was describing to Alison in my email response. The photo on the upper right of the page has a little loop of ribbon and you can flip it up to see more pictures.
I didn't take another photo of the bottom photo flipped down, but the journaling is under there.

This next page just has a pull out where the journaling is. It probably could have used a little tab of ribbon as well, but if you slit your page protector and leave it sticking out, that should be a clear indicator to give it a tug!

Hmmmmm

If you were something I could buy at the LSS (local scrapbook store), what would you be??? Take this quiz and leave me a comment, I'd love to know what YOU are! Quiz me!

Here's what I am:

You are Brads!
Your life is all about the details! You like to embellish your life like you embellish your scrapbook - with lots of details! You tend to be a perfectionist and like everything just so. You make time to stop and smell the flowers and try to fill your life with things to make you happy. You don't like to take a back seat in life - you like to stand out and are often in leadership roles. People love you because you always seem to have it all together. But Brads Beware - Your life can be overdone with details and can find yourself with too many projects on your plate to finish them all. Try to stay focused and prioritize more.

335 other people got this result!
This quiz has been taken 42010 times.
2% of people had this result.

November News

Do you get email notifications when I post new entries here? If not, use the subscribe feature on the right!
That way, every time I post something new, you'll get an email to let you know!

I have posted my November Newsletter with upcoming Stampin' Up! events and promotions...patterned paper is on sale!

You can use the "Newsletters" link under my profile or simply click on this:


NOVEMBER NEWSLETTER

Sunday, November 4, 2007

A Nifty Little Coaster Book!

I told you about VSBN which started yesterday, and one of the challenges was a mini accordion book made from square coasters. I didn't have square coasters so I cut some cardboard that came in a paper pack to 4x4 square and rounded the corners on 2 sides!
The complete tutorial is on Nicole Heady's Blog, Capture the Moment, and it's a pretty fun little project. I wanted to use the last of some patterned card stock from an old Simply Scrappin' Kit, so I made mine with a vintage look and dug out some old school pictures of my friends in 8th grade!
Here's the front:


I considered additional embellishments, but really wanted to keep this one simple...not to mention the constant interruptions from my three year-old - it's been one of those days!
The inside contains two mini accordion style "booklets" that fold out to reveal pictures and journaling. This was really easy, and with the right pictures, it has gift potential!

Monday, October 29, 2007

Secret Scrapping...Shhhhh


Well I did actually scrap a page last week. I had it almost finished Thursday night and then Friday after work I put on the final touches!!! Wanna see!? Ooops sorry, it's top secret!

Yeah, really! I can't show it to you until Saturday the 3rd when I challenge YOU to scrap a page following my own set of "rules," hee hee!!! Well I hope you are curious, and plan to tune in for the unveiling and it would be AWESOME if you play along too!

VSBN (Virtual SCRAPBOOKING Night) on Splitcoast starts Saturday 10/3/07 at 11:00 AM CST, my challenge will be the final one for the day at 9:00 PM - that's 6 challenges 2 hours apart Saturday, and then the fun starts all over again on Sunday...same schedule 11-9 CST!!!

Also, in the spirit of the upcoming Holiday, here is another somewhat "secretive scrapping thing!" My good friend and fellow SCSer posted a spooky menu for creating a page, and it's too fun!!! If you are a SCS member, just post to the thread and she'll reply with the details, if not send me an email and I'll follow up for you! Here's the link:

http://www.splitcoaststampers.com/forums/showthread.php?p=7574237#post7574237

Well since I can't share anything NEW with you today, here are some fun Halloween pages I've done...enjoy!


Friday, October 19, 2007

Keeping the Creative Flow Going

I made this sketch for one of the weekly scrapbooking challenges on Splitcoast. We post 3 challenges every Friday, and I'm a junkie! This one is today's SKETCH (SBSC112)!

There was a time when I was scrapping them all every week if I could manage it. But even with my current time constraints, I never miss one! I'll be taking the girls to the pumpkin patch this weekend and I'll be using those pictures ASAP to participate in the THEME challenge too! Sadly there are plenty others that have sparked my interest, I can envision the perfect series of photos and everything, but again where's my time!? Luckily for me, and for you, I have them all saved for future scrapping endeavors, and I share them as downloads on Splitcoast as well...you just never know when you'll steal a little "me time" for scrappin! And if you're going to a crop, this can be a GREAT resource for preplanned pages!

I also want to tell you about VSBN! I've mentioned it before, because we have one every few months, and it's when I usually lay down the law with my DH (dear husband), barricade myself in my craft studio, and SCRAP!!! The next one begins with a preview Saturday October 20, 2007, at 1:00 PM Central time -- TOMORROW! A new challenge will be posted every 2 hours for a total of 4. THEN, Saturday November 3rd our BIG WEEK-END begins. There will be LOTS more challenges, including one from yours truly. Hope to "see" you there!

Wednesday, October 17, 2007

Tuesday, October 9, 2007

not so CREEPY things...

Well I promised you Halloweenish things last week, but as you saw, I was knee deep in Girly things instead. It was worth it though! I'm posting a pic or two on my Yahoo blog today...man now THAT is a neglected blog!


Have I mentioned yet that i LOVE the new Designer Series Double sided paper!!! This Halloween version is too cool, the paper in the background is part of the set, along with all the patterns represented in my projects! Ain't they CUTE!? I made the treat pouch on Tuesday, but just never found the time to post it here...what'cha think? This was a really easy project I learned over a year ago from my upline, and I actually have a tutorial you can download!

I've been wanting to make a shadow box picture frame for a while now, and decided it didn't need to have a "real" photo inside. I enjoy decorating my home for Halloween and this will look great in the family room among my baby pumpkin collection and assorted candles...I might just make a couple more! It's about an inch deep and the "photo" inside is mounted on TWO cardboard squares to make it pop! The overall size is 6X6, pretty simple design I just cut cardboard with a craft knife. Here's how I did it:

TWO 6x6" cardboard pieces - Cut a 3 1/2" square piece from the center of one. Then trim the piece you removed down by half an inch to a 3x3, cover with paper and set aside. Cover the frame completely with a 6x6 piece of paper. Slit the paper in the "window" with an X from corner to corner and fold in the excess to secure. Cover the other piece front AND back.

ONE 2x2" cardboard square for under the photo mounting. Adhere to inside piece of frame in the center and then attach the 3x3 piece you covered with paper over it. This will allow the center photo to "pop." I suggest adding your photo before you "sandwich" the top and bottom of the frame together.

FOUR 1x6" strips of cardboard, glue them one by one around the edge of the top piece, on the inside. You will need to trim 2 or 3 of them slightly to make it a perfect square along the edge.

FOUR 1 1/4 x 6" strips of patterned paper to cover the sides after the whole thing is glued and set...you might take your own measurement and make sure this will cover the sides completely. I did a little stamping on the front of my frame...and I dredged the edges through my black craft pad too -- imagine that! hee hee Now it's your turn!!!

Creative Crunch!

This past week-end was MEGA busy! I had a sick little one on Friday, but managed to utilize that time to get my laundry finished and clean house in preparation for my 6 year old daughter's birthday party! Another MAJOR accomplishment was finishing these tins I'd started on Wednesday.

Sydney hand picked this patterned paper at Michael's and helped me adhere them to the tins that same night, but bedtime kept us from completing the project. On Thursday night she did the scallop pieces all by herself and I added the ribbon. I found the other sheet of paper in my stash, and picked an alpha to stamp the names with, but again bedtime crept up on us, so I didn't finish them until Friday.

The party itself was a blast!!! It was kind of a spa theme because I took the kids to a salon for a facial, and nail painting. So inside the tins I put nail polish a sleep mask, lip gloss and each tin had differing bonus items! hee hee

I also had to whip up a birthday card for my girl, and decided to finally mount and ink up a retired set I got as my final "hostess" purchase! It has a BEAUTIFUL butterfly in it after all! ;)

It's a really simple card, more doodles than stamping, but I was really happy with the result, and Sydney LOVED it!!!


~~~~~~~~~~~~~~~~~~~

On Sunday my AWESOME sister came over and I did her One Sheet Wonder class with her one-on-one! Now THAT'S service! ;)

The project entailed cutting one sheet of 12x12 double sided designer paper into a specific configuration. Believe it or not, add 5 sheets of solid card stock, a few scraps and a mere FIVE hours later you'll get this whole set! 10 cards and this adorable tote to store them in!!! I'm totally in love with this project and look forward to applying this strategy to make additional sets! Who wouldn't LOVE to get one as a gift?


Thursday, October 4, 2007

$$$Dolla Stamps$$$


You would think as a Stampin' Up! demonstrator I would be able to resist buying stamps when I find myself at a craft store...but Noooooo!!! If you are an addict, you are an ADDICT!!! hee hee
These little $1.00 cuties from Michael's just begged me to bring them home, and how could I say no!?
I also just got the new designer series Halloween paper, so I'll be sure to play with that too! :)

Wednesday, October 3, 2007

October is HERE!!!

Well to get you in the mood I posted a music video for my ALL TIME FAVORITE movie, The Nightmare Before Christmas! As far as crafty stuff, I'll have some cool "Halloweenish" thingies to post before the week is out, so stay tuned!!! ;)

Sally's Song-Nightmare Before Christmas

Sunday, September 23, 2007

Scrappa Dappa Doo!


I managed a little free time last night and this afternoon to complete the sketch and create a second page using most of the remaining pictures. This was a fun layout, and I may just use it again with a single large photo, but I'm pretty pleased with this composition. My scanner made the patterned paper look different, and I hadn't noticed before I posted in my gallery, so I opted for a photograph of the entire DPS here, click on it for a closer view. Hope you like it!

Friday, September 21, 2007

Stimulate Your Senses

I have been called upon to host the sketch challenge this week on SplitCoastStampers. I did it last week as well, and will be hosting a few more over the next few months. You guys know how much I LOVE sketches, so I will be posting some of my own creations, but for this week I simply did not have the time. My girls have kept me craZy busy lately!
However, I would be lying if I told you I didn't even try, but I wasn't happy with where it was going and haven't had a chance to get back to it and prefect it. So here's a sketch that I had saved on my laptop for a rainy day. Unfortunately I can't give credit to the person that created this sketch, I have NO idea where I found it. It's not fancy schmancy, but it has interesting angles and the user should decide how to make it their own with all the little extra details that will make it truly FABULOUS! Check back soon, because I will be scrapping this one to post here over the weekend!!!

Thursday, September 20, 2007

...Everybody Must Get Stoned!!!


I wanted to share this with you for Technique Tuesday, but instead will call this the "technique of the week!" ;)


If you've never seen this before, it's one of my all time favorites and the effects can be downright breathtaking!!! I felt it was the prefect compliment for this stamp set, which happens to be on promotion this month for 30% off, contact me if you'd like to know more about the promo!


The technique is called POLISHED STONE

Supplies:
Glossy white cardstock
1 metallic reinker (or a metallic craft pad)
2 or 3 classic reinker colors
Stazon Black ink pad
Acrylic sealer
Rubbing alcohol
cotton ball


On your glossy cardstock drip the metallic ink in several places, or if you are using a pad "smudge" it onto your paper directly. Either method works fine, in my example I used a reinker.


Then soak a cotton ball with alcohol, not "dripping wet," but well saturated, and apply a dot of each additional color to the cotton ball - not the paper!


Now things get a little messy...
"Pounce" your cotton ball all over the paper until you are satisfied with the ink coverage, there is no right or wrong to this. Just keep pouncing until you like what you see, and be careful of any stray cotton fibers that may want to stay behind on the paper!


I generally allow the paper to sit a few minutes and then I seal it with an acrylic sealer. This is important because the craft ink will smudge if not sealed on the glossy paper. You may also elect to do this step outside or near an open window...peeee-eeeeww!!!


Give the sealant a few minutes to dry, and you can tell by the way it looks, and then stamp an image with Stazon right over your polished stone! I love the way these colors blended together!!! Then simply trim any excess, if desired, and finish into a card or scrapbooking masterpiece! :D


STAMPIN' SUPPLIES:
Stamps: Thoroughly Thankful
Paper: Chocolate Chip, Ruby Red, Glossy White
Ink: Stazon, Copper, Vintage Violet, Close to Cocoa, Cranberry Crisp
Accessories: Antique Brass Hodgepodge Hardware (brads & ribbon slider),
brown grosgrain ribbon


Related Posts with Thumbnails