Valentine Castle
When I was a kid I always had to go over the top decorating my "shoebox" for Valentine's Day. I don't remember ever winning any contests, but I always had a lot of fun making my creations! Being a mom I have always been very involved whenever one of my girls needed to decorate a poster board, or any kind of school project involving paper and creativity! In 2012 I helped my daughter Sydney make a Valentine Village and sadly her sister didn't "need" a box that year since the teacher made them for the class.
Last year we didn't get started early enough, and opted for just simple ones made with cereal boxes. I even had a fantastic idea that I was super excited about doing in the future, sadly I forgot what it was!!! Whoops, back to brainstorming we go, and a castle it is! It was a bit of a group effort too. Since Sydney doesn't need a box this year, she pitched in to help make her little sisters castle awesome!
I had a few containers set aside and we began the process last Sunday...
Paper bags to cover the exterior of the castle;
Real Red card stock for the trim flags, and hearts;
Decorative Dots Embossing Folder - to give the paper bags texture;
Woodgrain Embossing Folder - for the drawbridge;
Baked Brown Sugar Classic Ink, to dab on the paper and make the texture pop;
A couple of heart punches for decorations;
Metal wire for the flag hanger...I had this laying around;
And white glue and tape to put it all together.
The chip canisters are upside down so the tops are metal, we put hearts on them! =)
The cracker box was cut so we could inset the oatmeal container. Once I had all the parts assembled we began gluing the paper on. It is totally pieced together.
The lid to the oatmeal container was removed and replaced with a cone we made. I stuffed it with leftover pieces of crumpled paper bag to make it more durable since kids will be lifting it off to put the valentines inside.
Natalie put the lid in her backpack so she can close it up for the walk home after the Valentine party.
My husband helped her find some nice courtyard pictures to choose from and printed one for her to glue on. We considered connecting the drawbridge to a little "rope" or "chain" but since we wanted to leave it open Natalie decided she liked it fine like this.
Here's a closer look at the little flags. We also used a little piece of Red Glimmer Paper and attached the flags with glue dots.
A couple more details...just little windows cut from the leftover border of the courtyard printout!
Hope you enjoyed this, we certainly had a lot of fun putting it together!!
Last year we didn't get started early enough, and opted for just simple ones made with cereal boxes. I even had a fantastic idea that I was super excited about doing in the future, sadly I forgot what it was!!! Whoops, back to brainstorming we go, and a castle it is! It was a bit of a group effort too. Since Sydney doesn't need a box this year, she pitched in to help make her little sisters castle awesome!
I had a few containers set aside and we began the process last Sunday...
Step One - Materials
We used a cracker box, 2 stackable chips containers, and an oatmeal container;Paper bags to cover the exterior of the castle;
 |
| 102482 - $6.95 |
Decorative Dots Embossing Folder - to give the paper bags texture;
Woodgrain Embossing Folder - for the drawbridge;
Baked Brown Sugar Classic Ink, to dab on the paper and make the texture pop;
 |
| 119883 - $16.95 |
Metal wire for the flag hanger...I had this laying around;
And white glue and tape to put it all together.
Step Two - Putting it Together
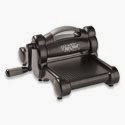
I had to cut the paper in strips the width of the embossing folder, but left them twice the length. After running them through my Big Shot I just flipped them around and ran them back through. The dot pattern is random enough that you couldn't tell. |
| The embossed paper was inked to really show the texture |
The chip canisters are upside down so the tops are metal, we put hearts on them! =)
The cracker box was cut so we could inset the oatmeal container. Once I had all the parts assembled we began gluing the paper on. It is totally pieced together.
The lid to the oatmeal container was removed and replaced with a cone we made. I stuffed it with leftover pieces of crumpled paper bag to make it more durable since kids will be lifting it off to put the valentines inside.
Natalie put the lid in her backpack so she can close it up for the walk home after the Valentine party.
My husband helped her find some nice courtyard pictures to choose from and printed one for her to glue on. We considered connecting the drawbridge to a little "rope" or "chain" but since we wanted to leave it open Natalie decided she liked it fine like this.
Here's a closer look at the little flags. We also used a little piece of Red Glimmer Paper and attached the flags with glue dots.
A couple more details...just little windows cut from the leftover border of the courtyard printout!
Hope you enjoyed this, we certainly had a lot of fun putting it together!!


